Tuesday, January 17, 2012

Sewing Room

I've been sewing at my kitchen table for 2 years now.  It's actually a decent spot with a nice light and view.  The only time we use our table for any normal dining activities is when we have guests over.  Then all the stuff gets moved on to the floor and back out when they leave.  As far as my fabric and supplies.. well.. they're just all over the place.

From July 2010, the 'before AND long ago' picture:
Pink Baby Blanket
Our second bedroom was being used solely as a guest bedroom.  My husband has been wanting to empty it completely for a while but I wasn't willing to part with the bed in it.  It has water stains on it (odd yellow stains  but i swear it wasn't pee!) and everything but it was the MOST COMFY BED EVER.  It's better than my current bed, and I would have totally switched it out but it's a full size not queen.  So many of days (years) has he been asking me to part with it but I wanted it for my naps guests.

My husband has come up with a GREAT system to teach me how to purge stuff.  First he starts by moving it around so its unusable but has great excuses for doing so.  In the case below, he propped the bed up against the wall so I had most of the floor to use for basting a quilt I was making in December.


I started using the newly found floor space as my design wall.  So after I got used to it, he proposes a new idea.  This weekend he said "If you get rid of the bed in that room, you can use the whole room as your sewing room."

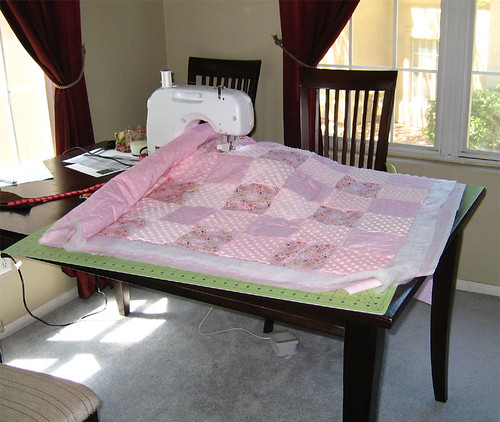
I contemplated this for a while.  (What? It was REALLY comfy)  Then about a half hour later that bed was like the plague and I was already in the process of craigslisting it.  I went and bought a 6' folding table and (as you can see in the picture above) and set it up in the room before dragging the bed into the middle of our living room floor.... which is where it currently sits because craigslist people can be really flaky sometimes.

This is still a work in progress as I'm not sure what's the best setup for me yet.  This is the new 6' folding table setup with my machine on the right and cutting board on the left.  I might go buy another table specifically for my cutting board because I like being able to walk around it instead of shifting my fabric to make a cut.

Here's a flashback for you: This is the exact same window as in the picture above but the color on the walls is what the previous owners left me with 8 years ago.  It took 2 coats of primer and then a coat of paint to cover it up.  The green line is uneven because I yanked down the most ugliest dark green and white flower border that used to be lined around the room.


I take that back.  I cannot say it was the ugliest wallpaper border EVER.  That title goes to the bird feeders in my living room that were pretty much super glued to the wall:


Ok... back on track!

I started randomly hanging stuff up on walls.  My rulers have a habit of storing themselves on the floor, so hopefully the wall solution will work for me.


Here's my fabric addiction:
(That pink box is filled with fabrics I yanked out for the Las Vegas Modern Quilt Guild block swap but I still haven't decided upon a pattern)

You should recognize the pillows below.  The one on the left is still waiting to go to its new home.


I have the Kona quilt hanging in the spot where I'd like to put a design wall.  It might get moved, it might not.  Not sure yet!

And finally I can begin using my knee presser foot lifter thingy again because it fits on this table!

And yes, that's my dining room chair. :)

Monday, January 16, 2012

Lined Drawstring Bag

I whipped up a couple of Jeni @ In Color Order's lined drawstring bags (Tutorial) this weekend: 


This was my first one:


I wanted to use these to store my binder clips that I use for sewing but I didn't pay enough attention to the size it would end up being.  This bag turned out to be huge!  Ok not huge... but 7" wide at the base and approx 9" tall.  So "huge" for what I wanted to use it for.

Joel Dewberry Aviary 2 Damask in Granite, top accent Lodge Lattice in Vintage Yellow, lined with Silent Cinema Front Row in Gray.

Here's my second one.  I shrunk it a bit.  I intended the herringbone to be the accent on the top but I still wasn't paying attention to what I was cutting and it ended up on the inside instead.  Although I think it turned out to be a happy accident.

Kumari Garden Tarika in Gem, top accent Kona Red, lined with Joel Dewberry Herringbone in Pond

It turned out to be 4" wide and about 5.5" tall.  It fits these perfectly:


Thank you to Jeni for her making her wonderful tutorial!

Sunday, January 15, 2012

Interlocking Stars

I'm jumping on the interlocking stars (aka Sparkle Punch) bandwagon because I love this and this and this and this.  I dropped everything I should have been doing to make this as soon as I saw it. A large quilt is on my someday to-do list, but for right now this will be turned into a pillow: 


I mapped out how much of everything I needed and chopped it all up.  All of the squares are 3" finished. It took a while to square all of the wonky stars up but for my next bigger project I invested in a 3.5" square ruler.

Saturday, January 14, 2012

Fabric Key Chains

One of my first sewing projects was making fabric key chains back in Dec 2009.  Mine is still going but it's all frayed and looks like crap.  The brocade fabric was pretty but probably the wrong choice.

I spent forever trying to figure out what fabric I was going to use for my new one (that was the HARDEST part).  I went with the purple Aviary 2 for mine (others are gifts) and while I still love it I gave it away because I now totally want something with that awesome Remix rainbow Stripe.  So.... I'm off to make another :)

Fabric left to right:
Outside: Michael Miller Love Birds, Inside: Remix, Ann Kelle, Stripe in Bright
Outside: Aviary 2 Sparrows in Lilac, Inside: Aviary 2 Lodge Lattice in Lilac
Outside and Inside: Andrea Victoria Black Damask

Fabric Key Chain tutorial is here.  I add one inch to the fabric cut length (14" instead of 13") so it is easier to put on my wrist.


Sunday, January 8, 2012

Sewing Entertainment

One day when I was quilting I was humming along to Katy Perry's Last Friday Night song for so long that my husband showed up and hooked me up with the actual video:

I have to admit this is a break from my norm, I usually (like >99% of the time) quilt to Taylor Swift with a little Lily Allen thrown in.  Anyone else have a standard go-to playlist for when they sew?

Tuesday, January 3, 2012

Las Vegas Modern Quilt Guild Pillow Swap

Just an FYI... All of the pillows have been posted over on the Las Vegas Modern Quilt Guild website

Pillow Swap Reveal

The LVMQG hosted a Not-So-Secret Secret Santa Pillow Swap (as I like to call it) where we each picked out a fat quarter for our inspiration. My swap partner chose Joel Dewberry's Heirloom Tile Flourish in Amber.

In my previous post I showed you the fabrics I pulled to match.  I stared at that stack of fabric forever and had no idea what to do with it. Personally, I love the Heirloom collection and wanted the actual design on the fabric to be the focus.  I didn't want to chop up the 'Tile Flourish' too small or you'll lose those large super-awesome designs.  I added the solids because I add solids to everything.  The two orange Kona colors I pieced amazingly matched both of the oranges in the fat quarter very closely!


I did a 1" straight line vertical quilting to keep with the stripe pattern and I attempted to add some waves to the solids.  For the back I had a piece of Amy Butler Twill in Mint which just happened to match.

Sorry, this is a boring pic, but I always want to see backs of pillows no matter what:

I added an invisible zipper to the bottom of the pillow.  I just bought the invisible zipper foot and this was its inaugural run.  It was super simple.  (Always visit Sew Kate Did for the best invisible zipper tutorial!)


Now for the pillow I received!

The fat quarter fabric I chose for my pillow inspiration was Kumari Garden Tarika in Gem:


My swap partner Mary used Texture Magic and sewed around each flower.  So it puffed up like this:

Which turned into this!


It's really cute!  I love how the puffiness worked so well with the fabric design.

She added a zipper to the back:


 and some design stitches around it to finish it off:


(Thank you Mary for my pillow!)

LinkWithin

Related Posts Plugin for WordPress, Blogger...